Before you can publish data with GeoCat Bridge, you will have to configure one or more server connections.
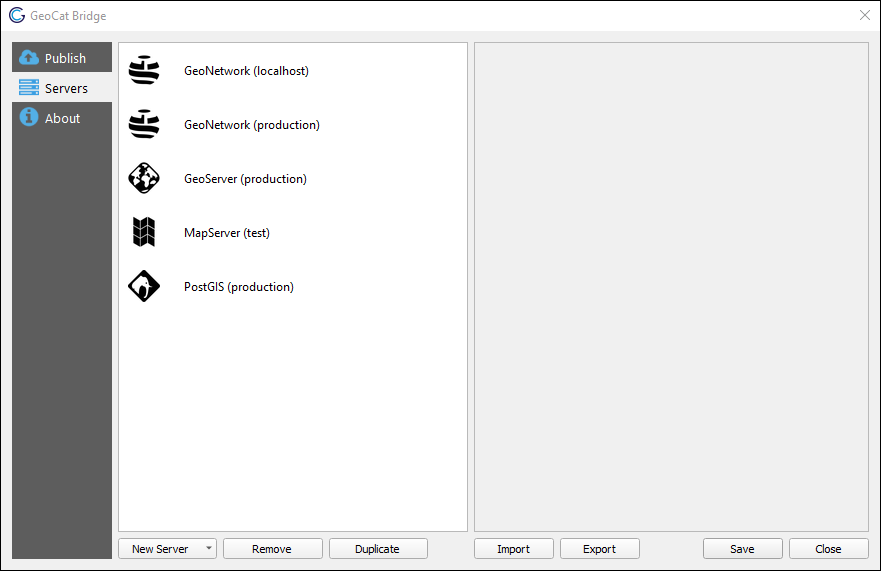
This can be achieved in the Servers section of the Bridge dialog:
Add new connection
Click New Server and choose one of the supported server types to create a new server connection:
GeoServer
MapServer
PostGIS
GeoNetwork
Fill in the required parameters and click the Save button to store the connection details.
You can edit the parameters of a server at any given time. Just select the server connection in the left panel, and edit the fields you wish to change in the right panel.
If you wish to remove a server connection, select it from the left panel and click the Remove button.
The Duplicate button may come in handy if you wish to try out an alternative configuration based on an existing
server connection.
Bridge will automatically store all server connections in the QGIS settings for later use.
However, sometimes you might want to backup or share all the configured server connections. The Export button will
allow you to save a JSON file of the current configuration.
The Import button will do the opposite and load server connections from a JSON file. Note that the imported connections will be
added to the list (i.e. no existing connections will be removed). Bridge will append a numeric suffix to server connections
with a name that already exists.
Below you can find more info about the different types of services and connections supported by Bridge.
GeoNetwork
Configure a GeoNetwork connection to publish your metadata to an online catalog (CSW).
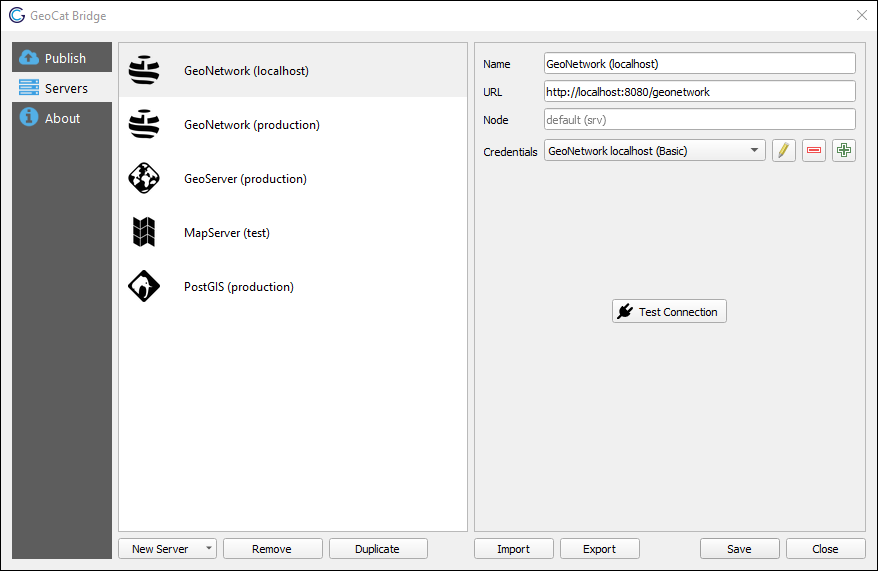
You can set a (unique) name to identify the connection, the server URL, and the corresponding credentials (user with publish permissions).
The default GeoNetwork node is srv, which will be used if you leave the Node field empty.
Click Test Connection to verify that the connection can be established.
GeoServer
Configure a GeoServer connection to publish your geodata (layers and symbology) as a map service.
When you add a new GeoServer connection, Bridge will automatically add the corresponding WMS and/or WFS endpoints to QGIS, so you can easily add to the server layers to your project, if needed.
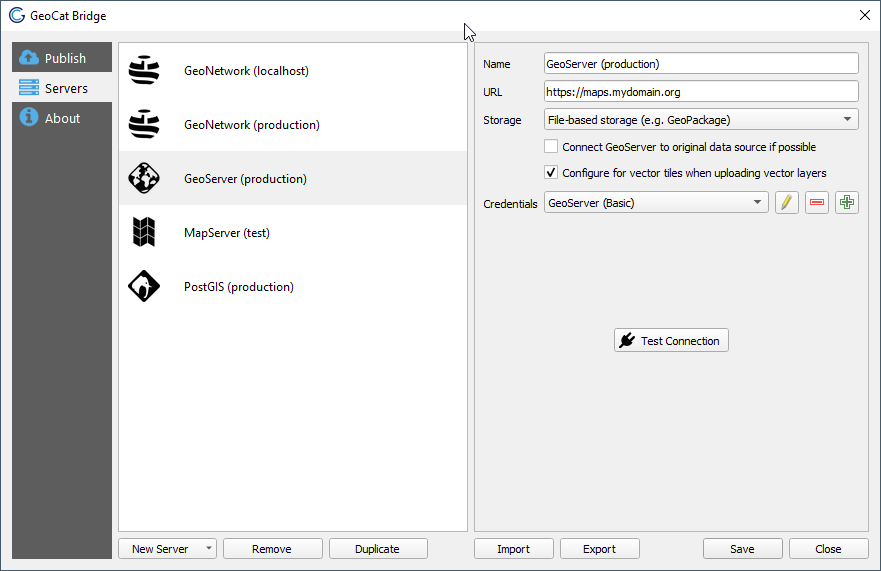
You can set a (unique) name to identify the connection, the server URL, and the corresponding credentials (user with publish permissions).
The URL can point to the GeoServer base URL (e.g. http://localhost:8080/geoserver) or the REST API URL (e.g. http://localhost:8080/geoserver/rest). Both URLs will work.
Click Test Connection to verify that the connection can be established.
You should also specify how layer data will be stored on the server. Three different methods are available:
File-based storage
The layer data is uploaded and stored as files (e.g. Shapefile, GeoPackage) in the GeoServer target workspace on the server.
If multiple layer data sources are uploaded, Bridge will try to combine them all in a single GeoPackage, regardless of the original input format.
If a single layer is uploaded, Bridge will prefer to upload a file in the original input format (i.e. a Shapefile will be uploaded as a Shapefile).
Import into PostGIS database (direct connect)
The layer data is uploaded to tables in a PostGIS database directly (i.e. by Bridge, see
PostGIS).
GeoServer will not handle the database upload, but merely establish a link to the database table in the created layer(s). This will require a direct PostGIS connection, which you can set up in the Servers section of Bridge as well (see below).
Note that GeoServer should also have read access to that PostGIS connection.
Import into PostGIS database (handled by GeoServer)
The layer data is uploaded to tables in a PostGIS database by GeoServer.
You must select a suitable PostGIS datastore on the GeoServer instance. Selecting this option will trigger a process that lists all the available datastores in each GeoServer workspace (which might take some time):
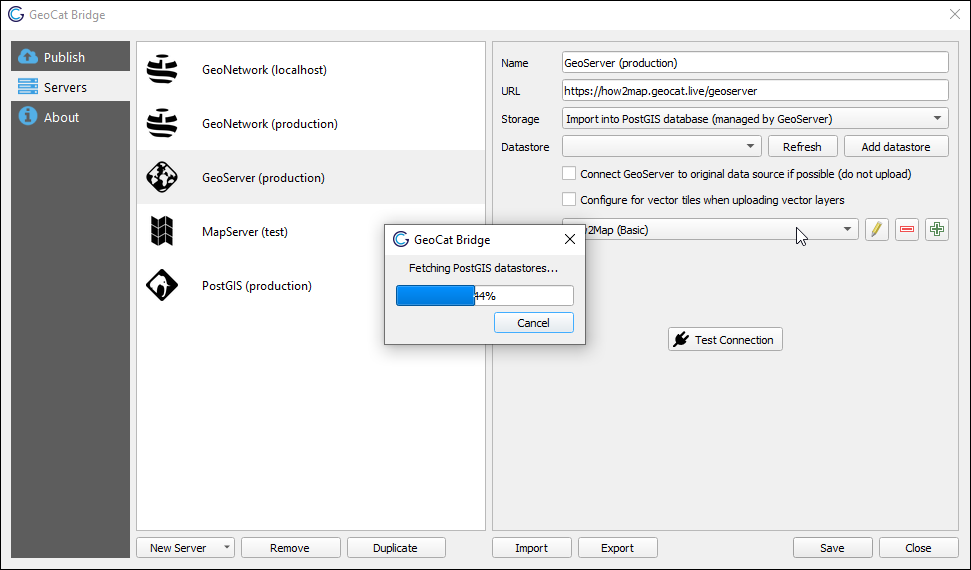
Note
The listed datastores will be prefixed by the workspace name to which they belong.
This does not mean that the layers will be published to that workspace as well.
Bridge always publishes layers to a (new) workspace named after the QGIS project name
(see
How to publish), but it will use the same datastore
connection details as
the datastore that you have selected.
If you wish to add a new PostGIS-backed datastore, click the Add datastore button.
This will open a dialog that allows you to specify the connection details. Make sure that GeoServer has full access to the specified PostGIS instance.
For more options (or if you wish to specify a JNDI connection pool) please create the datastore using the GeoServer admin page instead.
PostGIS
Configure a PostGIS connection if you wish to upload layer data to PostGIS directly.
Setting up this connection is required when using the Import into PostGIS database (direct connect) in a GeoServer connection.
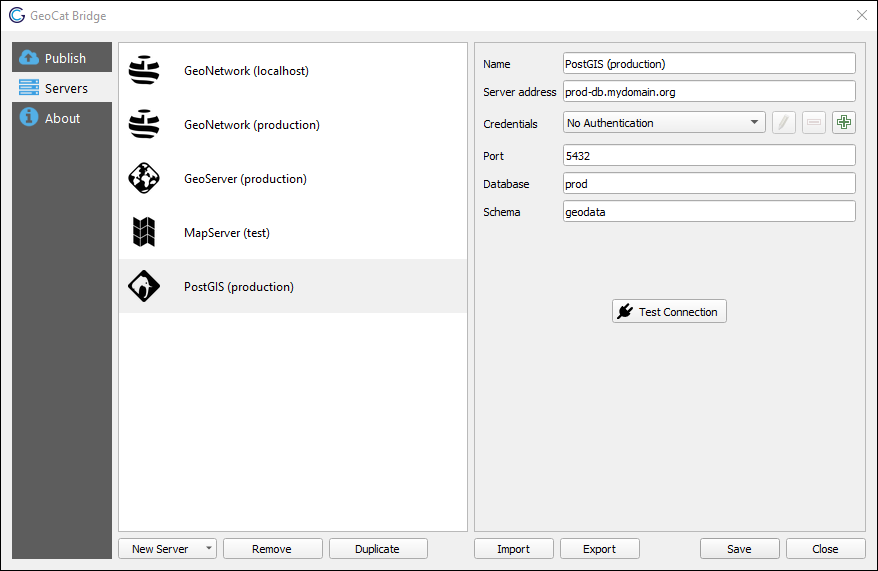
Note
JNDI connection pool support is currently unavailable.
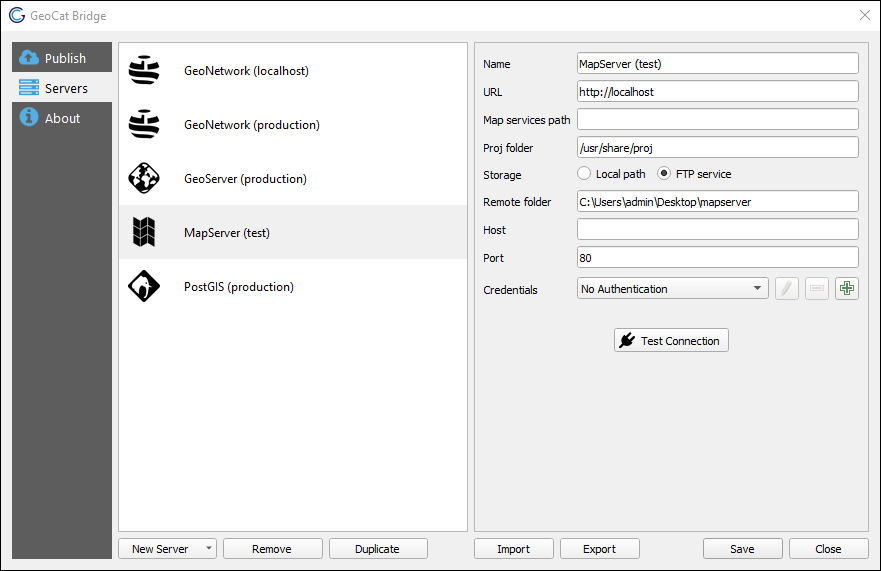
MapServer
Configure a MapServer connection to publish your map (layer data and symbology).
A MapServer endpoint (Mapfile) is created for each QGIS project.
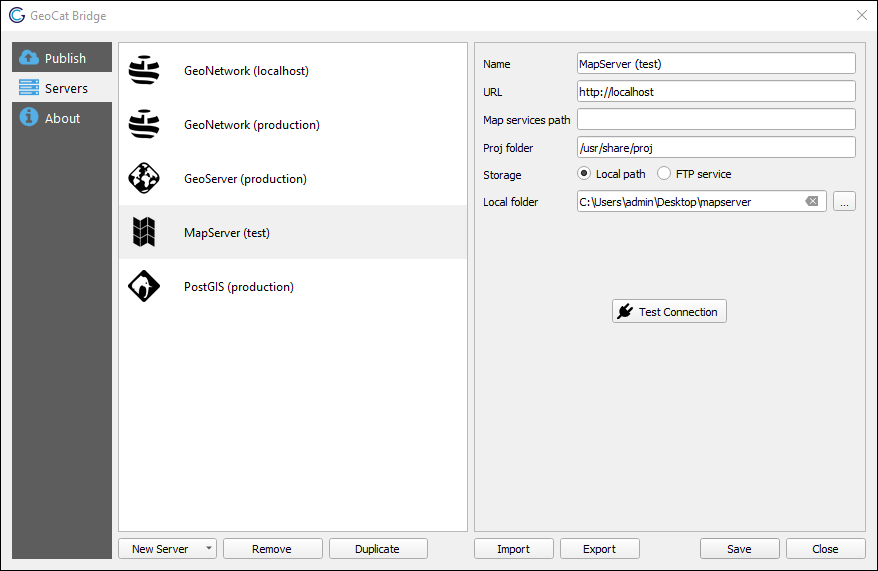
Under Storage, configure how Bridge should save the MapServer data.
Choose Local path to store all files on the local file system. Choose FTP service to transmit the
files over FTP to the online MapServer instance. Depending on which option is selected, you will see some additional parameters that must be configured: